Wreath making 1-2-3
You may not think about ordering plants that could provide cuttings for wreaths or flower arrangements, but using fresh or dried herbs this way is a lot of fun. In an afternoon, you can create herbal art that can grace a wedding table or a country picnic table. Need something beautiful for your bathroom that also smells great? Make a wreath for the wall or a floral arrangement for the counter.
When considering a plant to use for drying, there are a couple of questions to ask. What color will these leaves and flowers be when they dry. How long will they hold their color? How easy are they to work with in both their fresh and dried state? When is it best to pick their flowers or leaves for the best result?
Wreath making is one of the most popular herbal crafts. There are endless combinations of textures and colors that can be combined to make wreaths that complement your tastes and decor. Here are a few basic guidelines for making a wreath from fresh herbs that will dry on the frame. This is a very easy way to work with herbs, since they are supple and form easily to the wreath.
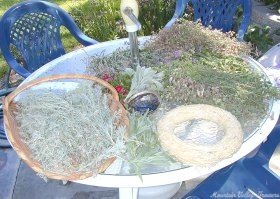
Step 1: At your table:
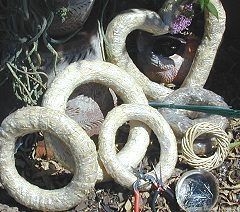
Bring together the few tools you need to make your wreath. These include the wreath form, usually straw or moss covered, sturdy wire for making a hanging loop, floral pins, small needle nose pliers and shears.
Step 2: Out in the Garden:
In the cool of the day, take a large basket and your sharpest shears and begin the hunt for inspiration. Look for plants that will make good filler material, like Powis Castle Artemisia, flowering Culinary Oreganos, Greek Bay and Grey Santolina.
Keep an eye out for plants that will be useful for adding colorful and unusual accents, like Lavender, Bee Balm, Baby’s Breath, German Statice, Ornamental Oreganos, Vitex and Butterfly Bush Wands.
Be sure to cut some special focus pieces like clusters of miniature Roses or Lamb’s Ears leaves and heads of Gold Yarrow or colorful Statice.
Cuting pieces about eight or ten inches long as you go will make it easier to use them when making the wreath. Lay them carefully in the basket so they don’t get tangled up. You will use eight to ten of these pieces in each bundle you pin to the wreath. For a 12 inch wreath it takes approximately 60 bundles, so cut a lot!
Filler Plants
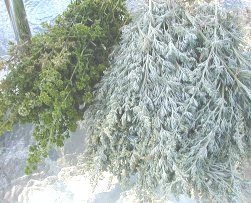
Green flowering Italian Oregano and gray leaved Powis Castle Artemisia are two of our favorite bulk filler plants. Culinary oreganos make nice filler plants and ornamental oreganos make better accents.
Accent Plants
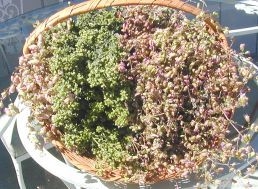
Full of ornamental oreganos this basket includes Dittany of Crete, Kent Beauty Oregano, Marshall’s Memory Oregano, Rosenkuppel Oregano and Showy Pink Oregano.
These plants help fill in the base plants while adding more color and interest.
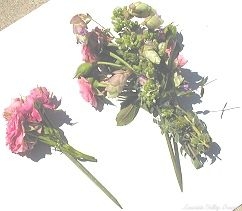
Special Focus Plants
To top off your wreath add a few clusters of really special accents like roses, statice or bee balms . These can be dried ahead of time if they are bundled and attached to a pick while pliable so they are ready to be inserted into the wreath when you are ready to make it. Drying roses allows you to see the color before you add them to your arrangements.
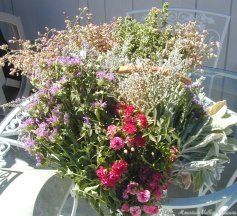
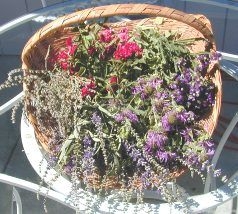
The basket is now stuffed with all the cuttings we will need to compose the wreath. It takes more than you might think so cut a lot when you are harvesting each plant.
Separating and laying out the plants by kind makes it easier to bundle them quickly. Also, handy nearby is our refuse bucket where the ends of the bundles will be discarded as the bundles are evened off.
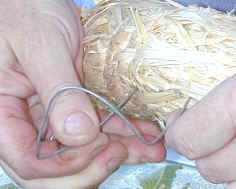
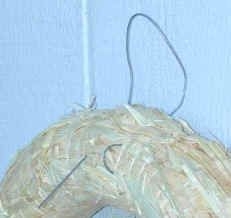
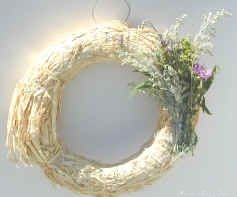
Step 3: Make a hanger:
Cut an eight inch or longer piece of a sturdy wire and bend it into a U. Insert this in the back at the top for a hanger. Hanging on the wall the wires are poking out the front. Use your pliers to curl the ends back into front of the base. Tie a piece of ribbon or raffia to the hanger so it will be easy to find when you are through. Push the looped wire firmly into the base until it is flush or just slightly imbedded. The wreath will end up being quite heavy and having a dependable hanger is important.

Step 4: Assembling the Wreath:
Make your first bundle by choosing several pieces of both filler and accent plants. Adjust the number of pieces to make each bundle very full. Bring the ends of your pieces together and trim the bottoms off so they are even.
Start at three o’clock on the wreath. Starting here allows the beginning and end of the wreath to be somewhere other than the top where the eye is drawn. If there is an adjustment to be made at the end, this is a better place to make it. By starting off to the side, the finished wreath will look more random and natural.
Next, place the first bundle in the middle of your imaginary horizontal row and secure with a floral pin. The next bundle will go on the outside of this bundle in the row and then a third will follow straight across to the inside.

Now the wreath has one complete row. Notice the gap at the bottom of the stems. The next bundle will be positioned to cover this.
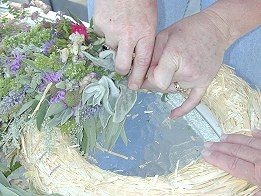
Work from three o’clock counter clockwise so the stem ends of each pinned bundle get covered by the next bundle until you reach three o’clock again. Bundles can be made to hold a lot, which will make the wreath making go faster, or many smaller bundles can be used. Here a special accent of a Lamb’s Ear Cluster is formed to the inside of the ring. Accent pieces like this Lamb’s Ears and the Beauty Secret Miniature Roses should be added randomly.
It helps to have a place to hang the wreath near the work space. After it is hung, there is usually a little more tucking and a trim or two that is necessary to tidy up the wreath.
Smaller pieces can be used for this last grooming of the wreath. Sometimes it is handy to tie small stems or bundles of small stems to a floral pick. The pick can then be inserted firmly into any gap that might show itself. This helps to avoid disturbing the other plants already attached to the wreath.
Step 5: Drying the Wreath:
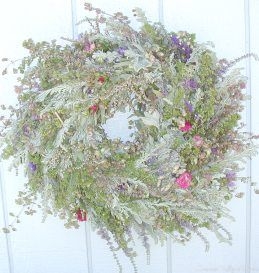
The wreath can be left flat to dry or hung up immediately. Hanging while fresh allows the bundles to shift naturally.
Step 6: Caring for Your Wreath:
To extend the life of your wreath, keep from direct sunlight and away from air conditioner and heater vents. Making a wreath using these instructions allows the wreath to be broken down so the base can be resued.
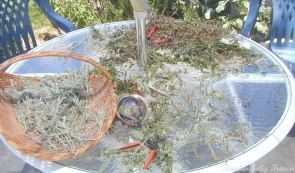
Step 7: Clean up!
Not much left, but what was left was put back into the basket and left to dry. Now we have a pretty basket too!
List of plants used in this wreath: Powis Castle Artemisia, Italian Oregano, Kent Beauty Oregano, Showy Pink Oregano, Garden Sage, Lamb’s Ears, Purple Statice, Magic Carrousel and Beauty Secret Miniature Roses, Bee Balm Flowers and Vitex.
Read how one of our wreath buddies uses her prunings to make a summer wreath.
To help you grow your own herbs for wreaths and other herbal crafts, we created two Herb Garden Six Packs that answer these questions and give you a place to start. Our Zone 5 -11 Crafter’s Herb Garden is for those in colder climates but can also be grown by those in warmer climates. Our Zone 8-11 Crafter’s Herb Garden was created for those gardeners in warmer areas.
Zones are one of the most misunderstood aspects of gardening. Our page on understanding zones will help you pick the right plants for your garden.